Friday 24 May 2013

Stamp Sorting: Take One!

Well, those of you who have been following me know that I have been sorting out my Mums craft stash into mine...and what a job it was!

For those of you who didn't get the update...I will put pics on here later!

Well, she had 27 folders full of stamps, plus there are my stamps plus the additional BOX of stamps which are new still in packaging!

I am taking it upon myself to organise them today!

They are totally mixed up!!


Here are SOME of the folders....


Wish me luck...

My deal of the day!


Well, I said I was not buying anything for two reasons...
A - Just finished college and have zero income!
B - I have all of mum's stuff and I am still not entirely sure of everything that is there!
 Well...
Someone on here who I have on FB is having a clear out and is selling stuff...
I bought two things :(
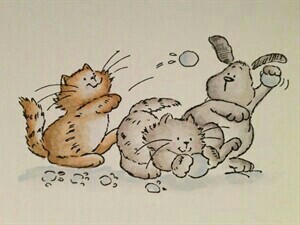
Bu..but, they are cute! Cheap too!
I spent £3 plus postage.....so far.


£1!!

£2!!


Good bargain! :D


Edit:

OK, I bought another one!
£1


Thursday 23 May 2013

Where have I been?

Hi all!!

I have not blogged in about a week as I have been looking after the boyfriend...

He managed to put his back out about two months ago and has been off work and he goes through peaks and troughs of how bad it is :(

Poor man...

I can't even slag him off saying he has "man flu"

LOL

Tuesday 14 May 2013

A card with brayering....take one!

Well, today I decided to get the brayer out and to attempt  the cards that Mum used to make. She did teach me how to do some of it once, but I have not picked it up since and could not remember much of it.

First attempt was the basic task of making a sky and water background on silk card.


The brayer Mum used!
I now have loads of these, I chose "Waterfall" as I am creating a water and sky background!
One mask and some crinkled paper later.....
One background!

~~~~~~~~~~~~~~~~~~~~~~~~~~~~~~~~~~~~~~~~~~~~~~~~~~~~~~~~~~~~~~~~~~~~~~~

OK, so once I had figured this out I decided to make a replica of one of Mums cards in her DoCrafts gallery...

Here is hers...


So...I got the stuff out and here we go!!


Image stamped with Momento Ink pad onto silk card.
Image Dippy toe stamp from clarity...not sure if that is it's real name but Mum always called it that!

I used this 3/4" stamp (now I know why she had it) to punch out a moon mask from a post it note! Make sure some of the sticky bit is on it.

Mask off the moon and the waterline to colour the sky.

Ink up the brayer as usual and then roll the excess off onto scrap paper and then fade at the edge of the brayer in the usual way :)

One coloured sky!

Mask off the sky to colour the water.

Ink up the brayer and take of the excess onto a crumpled piece of paper. Voilà  The ripples are transferred to the brayer!

Both areas are coloured and the water has a ripple effect.

Remove the moon mask to reveal the stamp below.

Trim to size.

Backing papers and peel offs.

scoring the backing card from A4.

Main image layered onto two pieces of card.

Corner peel offs added in three parts each.

Main lines added around edges of the backing card and then around the edges of the image and layers.

I added some ceramic roses to compliment the design as Mum did with silk roses.

Roses mounted with syllicone glue.

Peel off design.

Main image mounted.


                          Mums                                                                            Mine


Monday 13 May 2013

Made on Friday

I made this topper on Friday....

Now just to layer it, glitter it and make the rest of the card!!


Image from SWALK series. Black momento ink pad.

Coloured with promarkers and then lettering is embossed with gold.

Sunday 12 May 2013

First promarker attempt in two years!

well I decided to have a go at using promarkers for the first time in two years.

I was always pretty decent at getting the forever friends bears looking realistic, so thought it made sense to start there....

here are the results!

image stamped with black momento ink pad.

promarker colour blush layered to create shaddows.

blender pen used to smooth and lighten.

rose pink for the wings layered to create gradient and pastel pink for cheekscheeks.

blender pen used to smooth wings (tiny bit of bleed) and silver promarker used for star.

Another attempt....

... and another....

different image, same technique.

best so far I think....

something a bit more challenging! 

No crafty stash!!!!

Well, I am at my lovely boyfriends house for the weekend but this unfortunately means I have no craft stash to play with!!

I think I will have to just bring over some stamped images and promarkers next time so that when I get the itch, I can play! 

He has saw my craft stash anyway! He actually is interested when I'm doing stuff and asks about it all :-) 

Kinda cute huh? 

He has yet to see me do anything silly though :-/

I will update later with images of the card I made :-)

Saturday 11 May 2013

How did she do this???

OK, so looking through Mum's gallery on facebook and docrafts, there is a lot of barbera grey stuff in there.

One of the main techniques she used was the brayer.

Now, she did teach me but it was years ago and I have totally forgotten how to do this.

I have all the kit needed and all the stamps....there are templates of the words "Love" etc with the centre circles cut out....

Do any of you have any idea how she will have created this card? Just the stamping techniques I mean with masking etc...


I know that there are several layers of card here all done seperately, the main thing I am concerned with it the stamping and colouring of the inside of the letter "O" and also, how did she do the backing card?

I am guessing some kind of brayer technique with scrunched card? but how did she get the leave pattern which is a barbera grey stamp to remain clear?

Friday 10 May 2013

Mimi storage!

So,

I decided to use my Mums little mimi tote for my essential tools and stickies for when I am making any card :D

Who would have known that you would need so many little things!!

I also put in mini tubs of little embellishments that I seem to use on all cards, gems and such :)

I have my scissors, sticky pads, glues, rollers, pens, picky tools, embellishments, and even some glitter in there!

Mum was using it for something similar I think judging by what was in it, but alas, she was disorganised!


Job well done I think!!! :D

Oh - and flowersoft tubs once empty are amazing for glitter and gems!

Idiot's Guide....

Well, I was making my first card the other day for the first time in almost two years and lo and behold, I open Mum's box she kept her cuttlebug in to cut out my stamped image with nestabilities....

What did I find?

An idiots guide to which plates to use and in which order for all the different kinds of folders and dye cuts.

She had a mix of spellbinders, cuttlebug, sizzix and loads of other kinds of stuff! I would have been clueless otherwise!!

I was grateful and through the tears caused by a mix of sadness and amusement, I managed to get it all done!


Thursday 9 May 2013

Cuttlebuggy goodness - OH MY!

Box upon box of cuttlebug, sizzix and spellbinders folders and templates!


All of these were Mum's and she obviously decided on storing them in an interesting way!


She actually managed to organise something AND save space!! If you knew my mother, you would realise that this is as amazing as the first person to slice bread  :P


I do not even want to count how much stuff there is here or the cost! I think Dad might keel over if he knew!


She stored the embossing folders and dye cuts in CD cases with the magnetic wallets from asda for pictures to put on the fridge!!


Amazing idea!


CD case with embossing folders on right and brass templates on left!

Brilliant way to store all the spellbinders stuff!

Cuttlebug embossing folders

Nesties! All stored on magnetic plates! You never loose them!

Embossing folders galore!

Impressibilities, nestibilities and shapeabilities on the left, embossing folders on the right with some cuttlebug dye cuts!

Three boxes of stuff for the cuttlebug!!